Now, in terms of the plexi itself, it was ROUGH. And I didn’t take pictures while I was working on this one, do it’s hard to do this justice. Let’s describe it as: many light scratches combined with someone having carved their name in one corner. I considered getting a whole new piece made but decided to try the Novus plastic polish products. If you’re not familiar with Novus, the arcade/pinball community has been using and swearing by these polishes for a long time. I’ve never really had a great use for them, but in this case, I gave it a try. Novus comes as a set of three bottles – #1 (Clean and Shine), #2 (Fine Scratch Remover), and #3 (Heavy Scratch Remover). You actually use the three in a sequence – 3, then 2, then 1. The instructions are on the bottles, but effectively it’s a wipe it on then buff it kind of deal using a very soft cloth.
I tried the sequence – it took a lot of elbow grease and about an hour. Amazingly, it worked — not only did the tiny scratches come out, but the carved name was no longer visible, AND the plexi was good and clear (not fogged or otherwise bad). I’ve never seen a plastic polish work that well, and I’ll never question the price or performance of Novus again. What a great system!
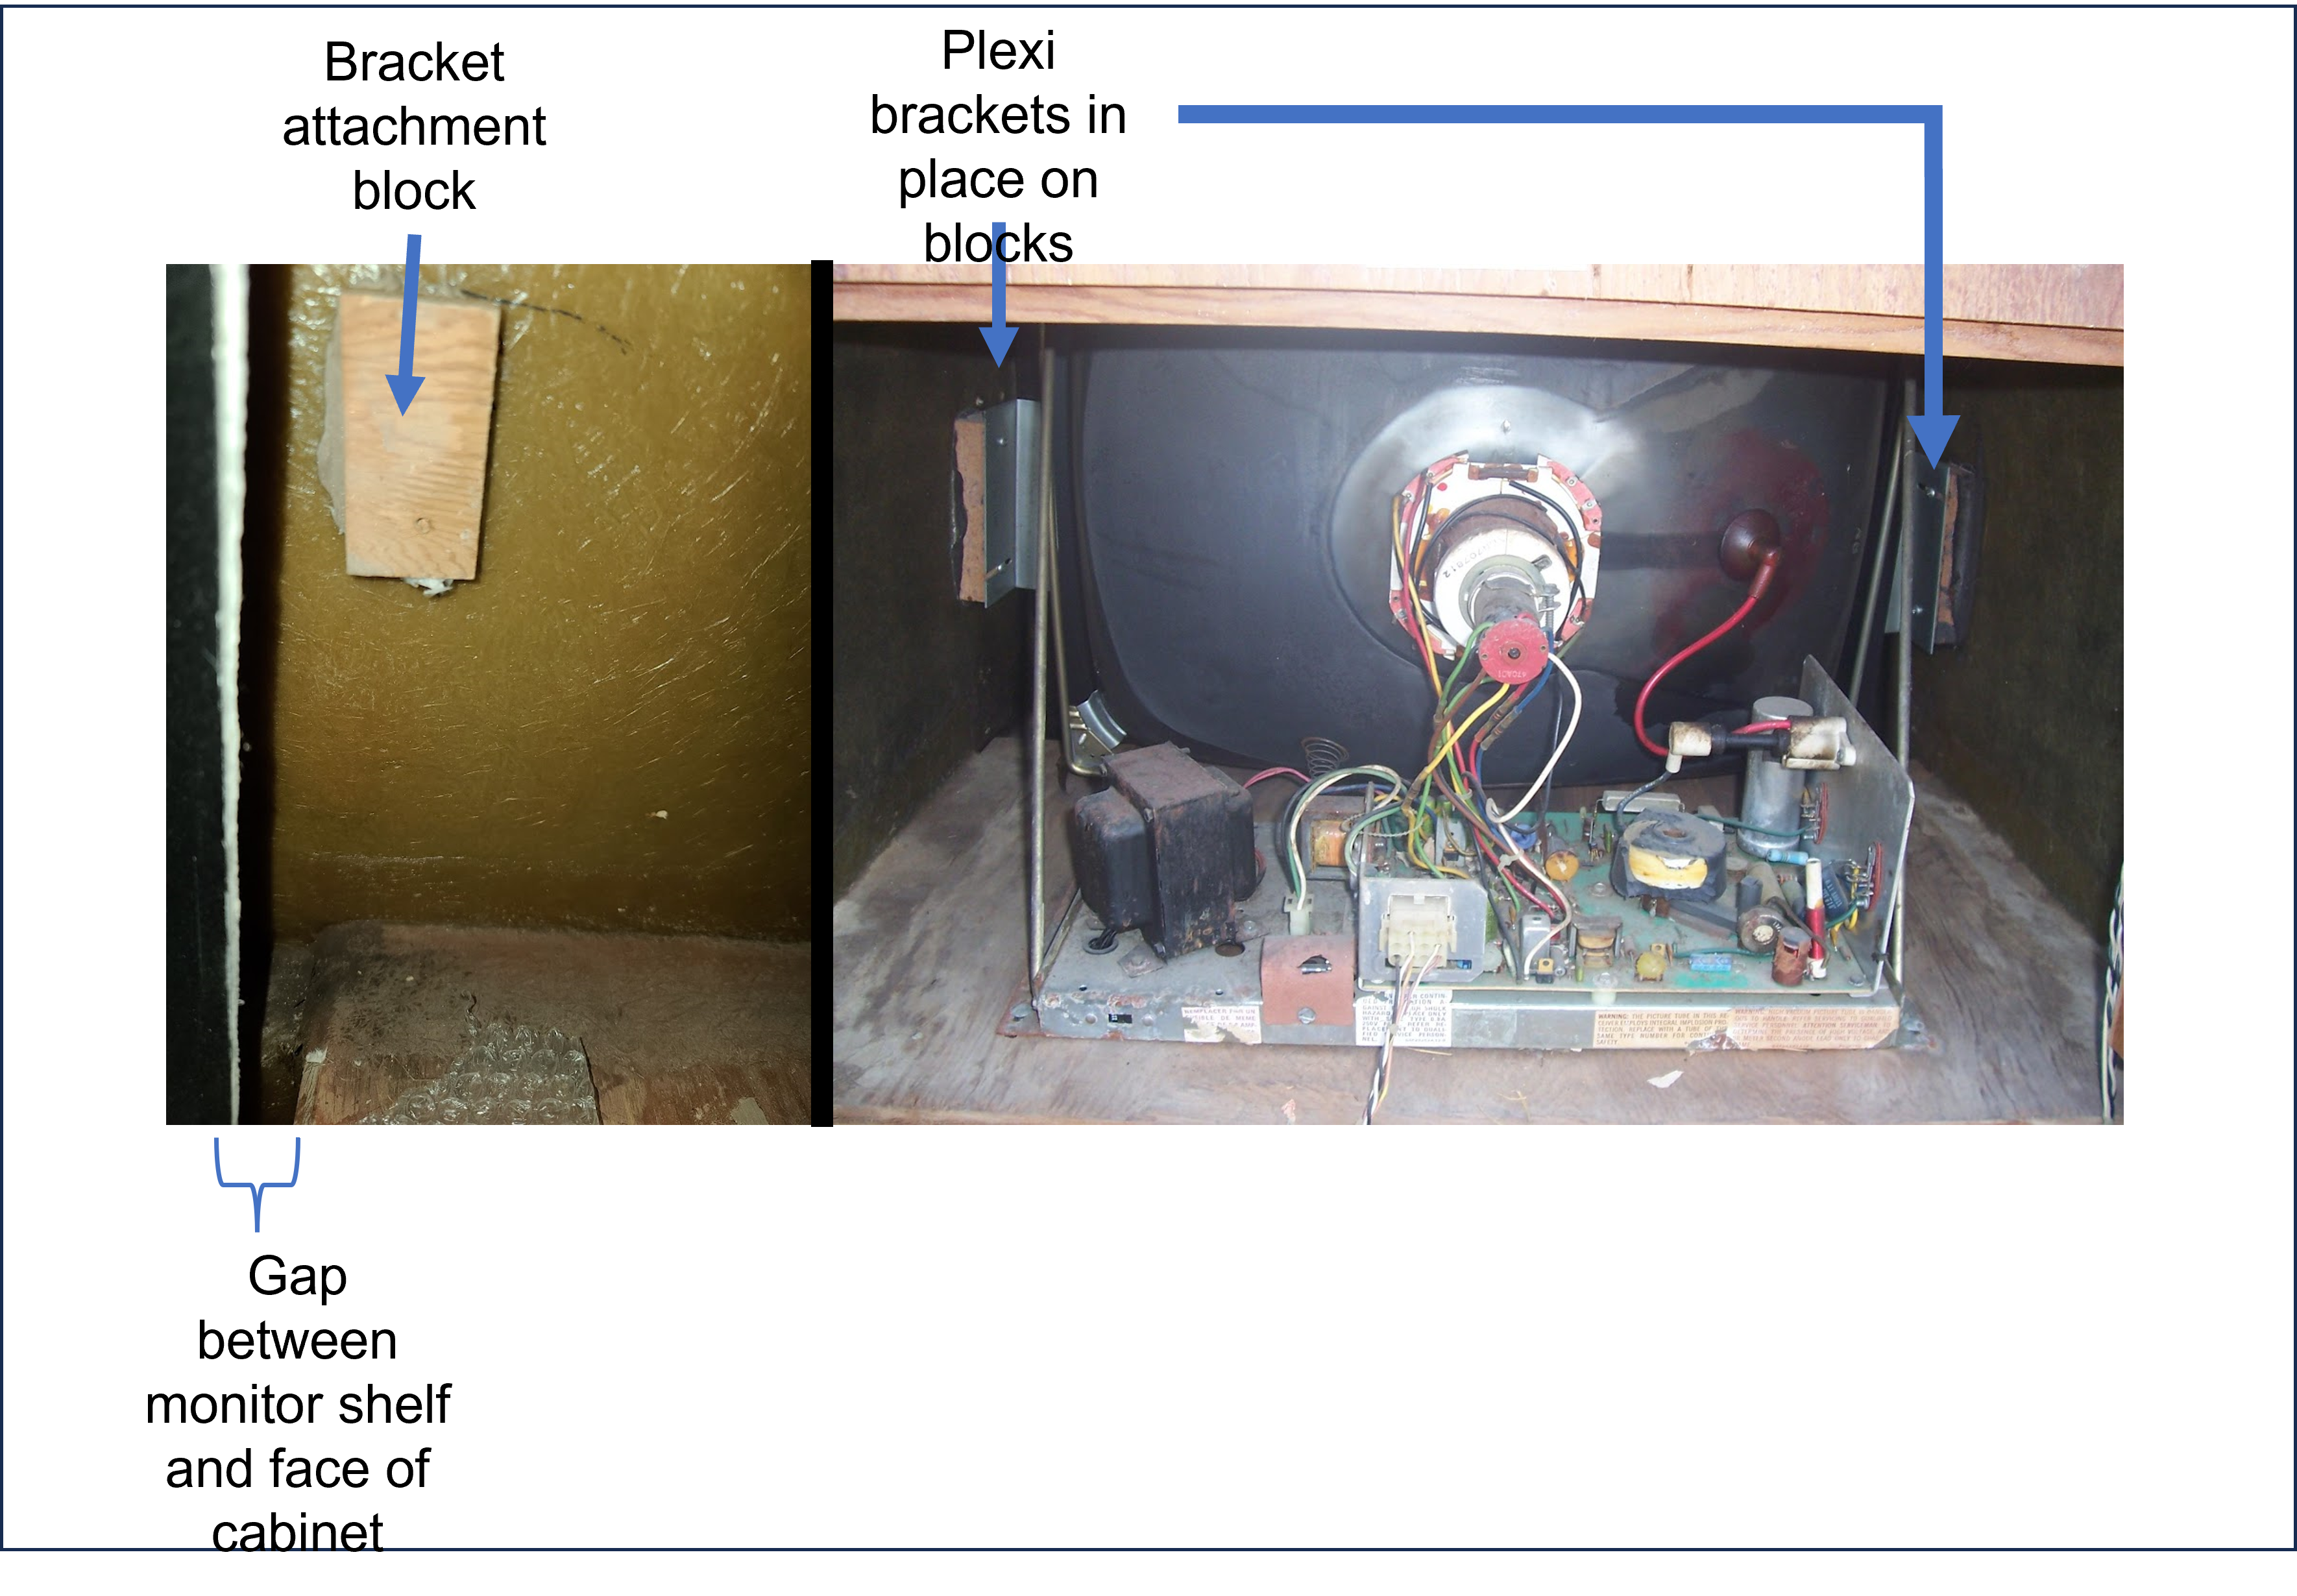
When I started deconverting the cabinet, and pulled out the monitor, I was surprised how the smoked plexi that sits in front of the monitor worked. On the bottom side, the plexi is secured via two long bolts that run through holes in the plexi and secure it to the front of the monitor shelf. On the top and sides, there are metal brackets that screw into wood blocks glued to the fiberglass body of the game. The idea is that you should be able to roughly adjust the position of the plexi and get it pretty close to the fiberglass surround in the front (so folks don’t stuff crap down inside the game). It’s a bit tricky, but by adding a few washers in the right spots I was able to get the right positioning.
