If you look at the wiring diagram in the ND upright manual, you see that that version of the game uses two parallel ganged 8-ohm speakers. It’s not really stereo – it’s a single channel projected out through two speakers. For the cockpit, there is one large speaker, and it is located under the monitor and mounted on the fiberglass via four rivets, as shown:
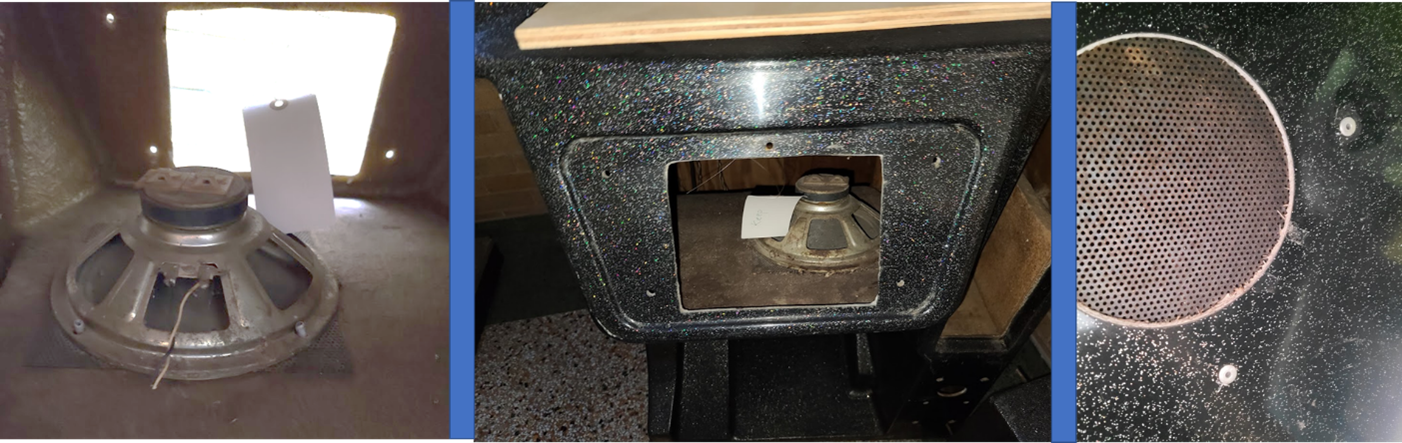
The speaker looked a little mangy in my machine, and the grill definitely could use a sandblast and repairing. I didn’t see any obvious markings on the speaker, but based on measurements assumed an 8” 4-ohm speaker would be the plan. I almost ordered the speaker — BUT – I was a little nervous about potentially ragging out the mounting holes if I drilled the rivets (which is the only way to get those out). So, I stripped back the pigtails already soldered on the speaker, touched them to a 9V battery (just to see if I could hear a good pop), then measured with my LCR meter to verify impedance (overkill, but…). After that, I crimped on a few pins and used a 2-pin molex shell. Why put yet another connector in this beast? Because the wires for the speakers go straight to the edge connector, and if for some reason I have to pull the harness from the machine again, I don’t want to have to cut or desolder wires. I did the opposite shell and pins on the harness side, labeled, and connected:
I guess we’ll see how it sounds once we’re all back together….